Crazy Cosplaying: Adventures into Dying Clothes

Hello, everyone! The other day I dyed one of my tops in order to get it to look closer to the picture above of Bella's top from the movie The Twilight Saga: Breaking Dawn Part 1. This is the second time I've dyed an article of clothing, so my confidence was there but a bit shaky. I found the original top at Good Will, and it was only for a couple of dollars due to some damage to the stitching. I thought it would be a good project for me to try out for the first time. So, I bought Rit fabric dye because I've heard that this was the best for the price. On the bottle it has a couple of ways of dying your fabrics. You can dye them in the washing machine or in the sink. I did neither and went the old fashion way: a bucket. So this is how I dye a top with Rit dye with a bucket.
First have the item that you want freshly washed and dried, and you need to make sure that if you are doing a top, unbutton all of the buttons. This is how it looked like before:
It was a light blue/teal color. It's a bit hard to tell in these pictures. Next you need a large bucket and three gallons of hot water. The instructions on the bottle say that if you are dying cotton (which I am), you need a cup of salt.
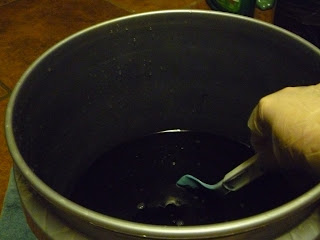
Mix all of that together until the salt dissolves. It shouldn't take too long with all the hot water. Once it's dissolved, add the dye. The bottle told me to add half a bottle for 3lbs of fabric. So, I added half the bottle of Rit dye. After stirring so all the dye is evenly distributed, add clothing item, and keep stirring for thirty minutes to an hour.
After dying is complete, rinse until the water runs clear. Then wash and dry the fabric/garment. As you can see, while the dye will dye the fabric, it will not dye the thread. You can also see better what the color was before to what it is now by looking at the close-up above and see the contrast between the stitching and the fabric. So, if you are dying clothes, make sure you choose a a color that won't be a heavy contrast with the original thread (unless that's the look you're going for). Also be careful with what your are stirring with. My spatula is now permanently blue, but it's just going to be my dying stir-stick from now on anyway.I think that this dye job came out well and looks closer to what I'm going for. I also have to repair the pin tucking and sew a belt to the back, but that is for another day. I hope this helps anyone who is looking to dye some fabric. I hope to see you next time!


Comments
Post a Comment